The Universal DB9 8 bit controller.
A DIY old school style joystick for
Atari 2600 - 7200, Commodore C64, ZX Spectrum. Texas
Instruments TI 99 etc.If you can squeeze two buttons on
there, you could also make it for the Sega Master System and
the Nintendo Entertainment System if you use an NES cable
instead of a DB9.
I really couldn't think of a better name for this. Here is my solution to overpriced old school controllers, some of which aren't that great to use anyway. This project cost me $23 Australian in parts (under $20 USD). More importantly it was a fun exercise, it's always more rewarding to make something yourself (",)
Note: This will only be good for you if you don't
mind micro-switch joysticks. Some people don't like the
clicking. I don't mind. I love the fact I don't have to
practically jam the thing between my legs and haul on it
just to get it to work!
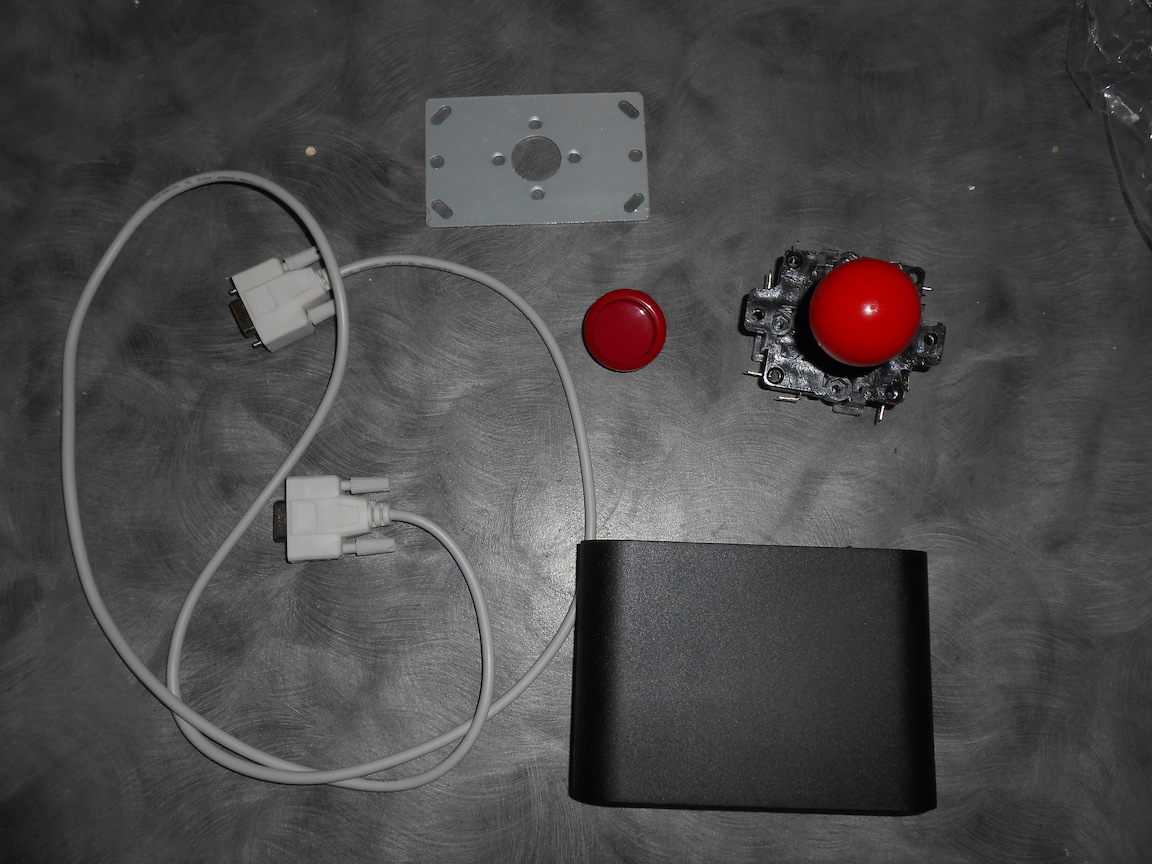
Parts list
5-6 ft serial null modem cable (or a broken controller)*
A bit of vero board
Wiring grommet (I used blue tack. Ghetto! Read on!)
I've linked to ebay listings to give you an idea.
Cheap stuff from Hong Kong with free post is fine for this
project. You may already have some of the parts, like the
RS232 cable. Get one of the push in arcade buttons as they
are the shallowest.
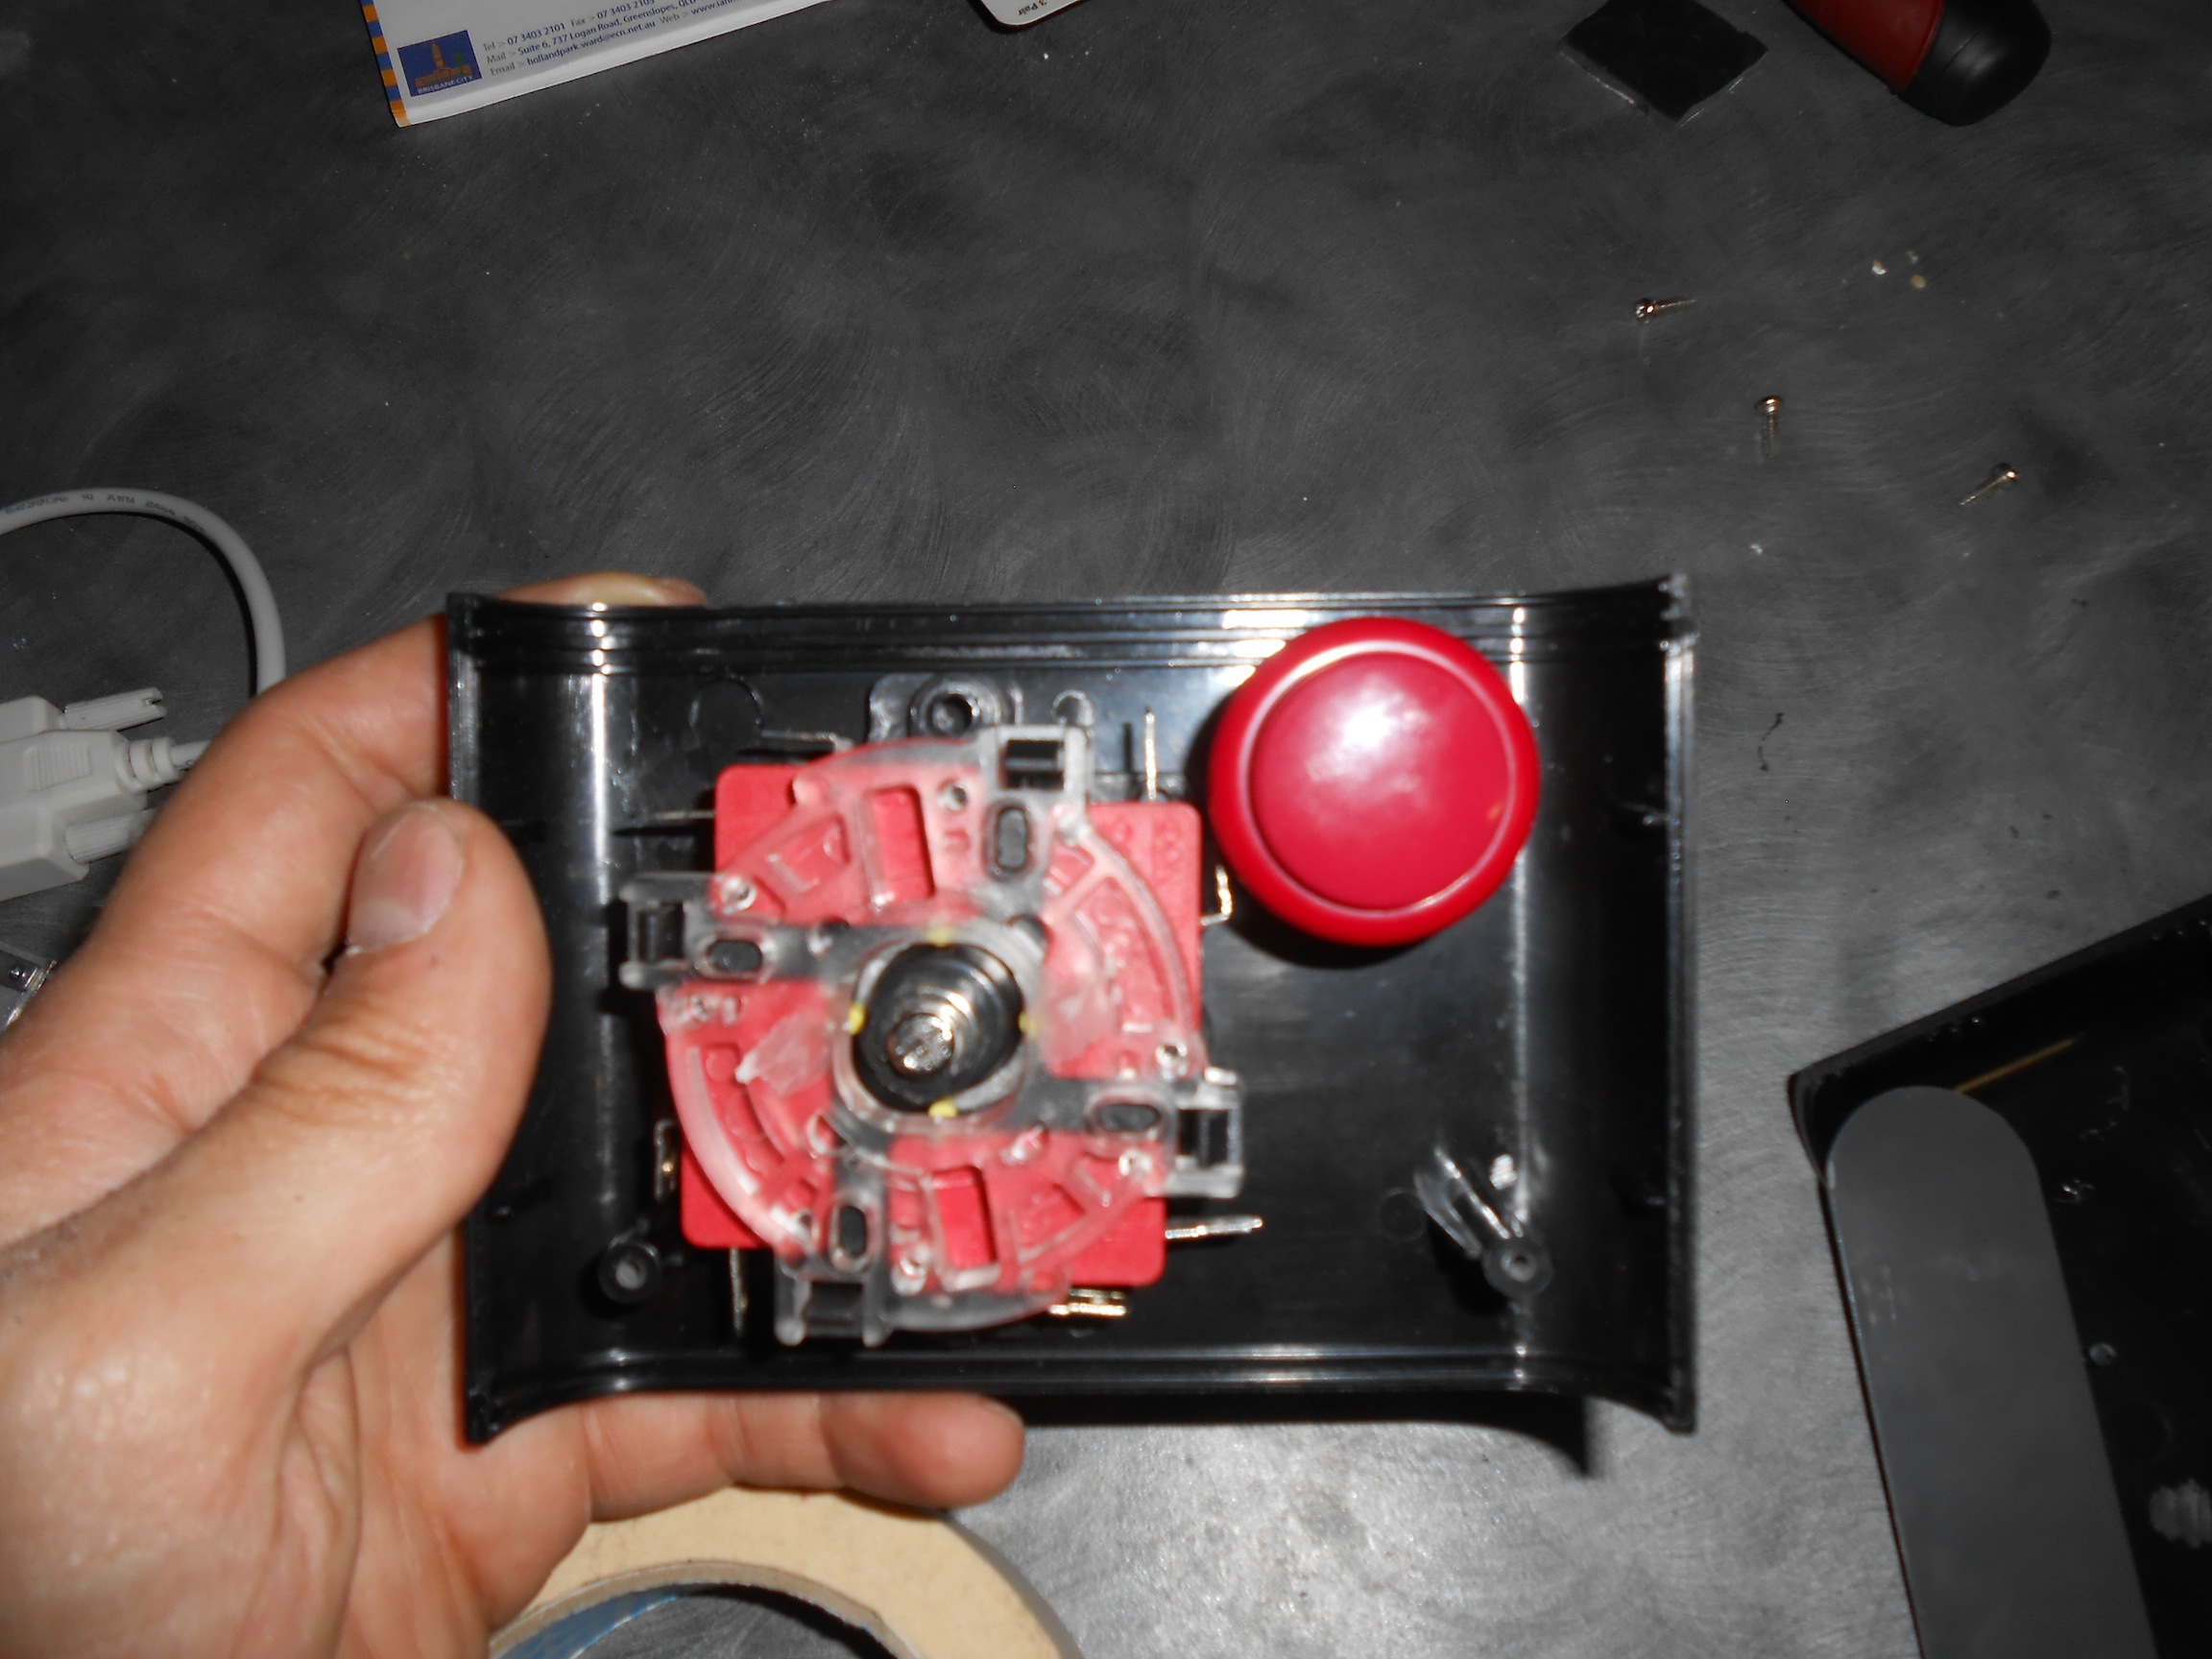
This is the exact joystick I bought. A cheap Sanwa-esque knock-off. Probably not the best, but it looked like the most compact. For 8 bucks, I'm happy with it. Besides, it's still heaps better than any non-microswitched 8 bit joystick in my opinion!
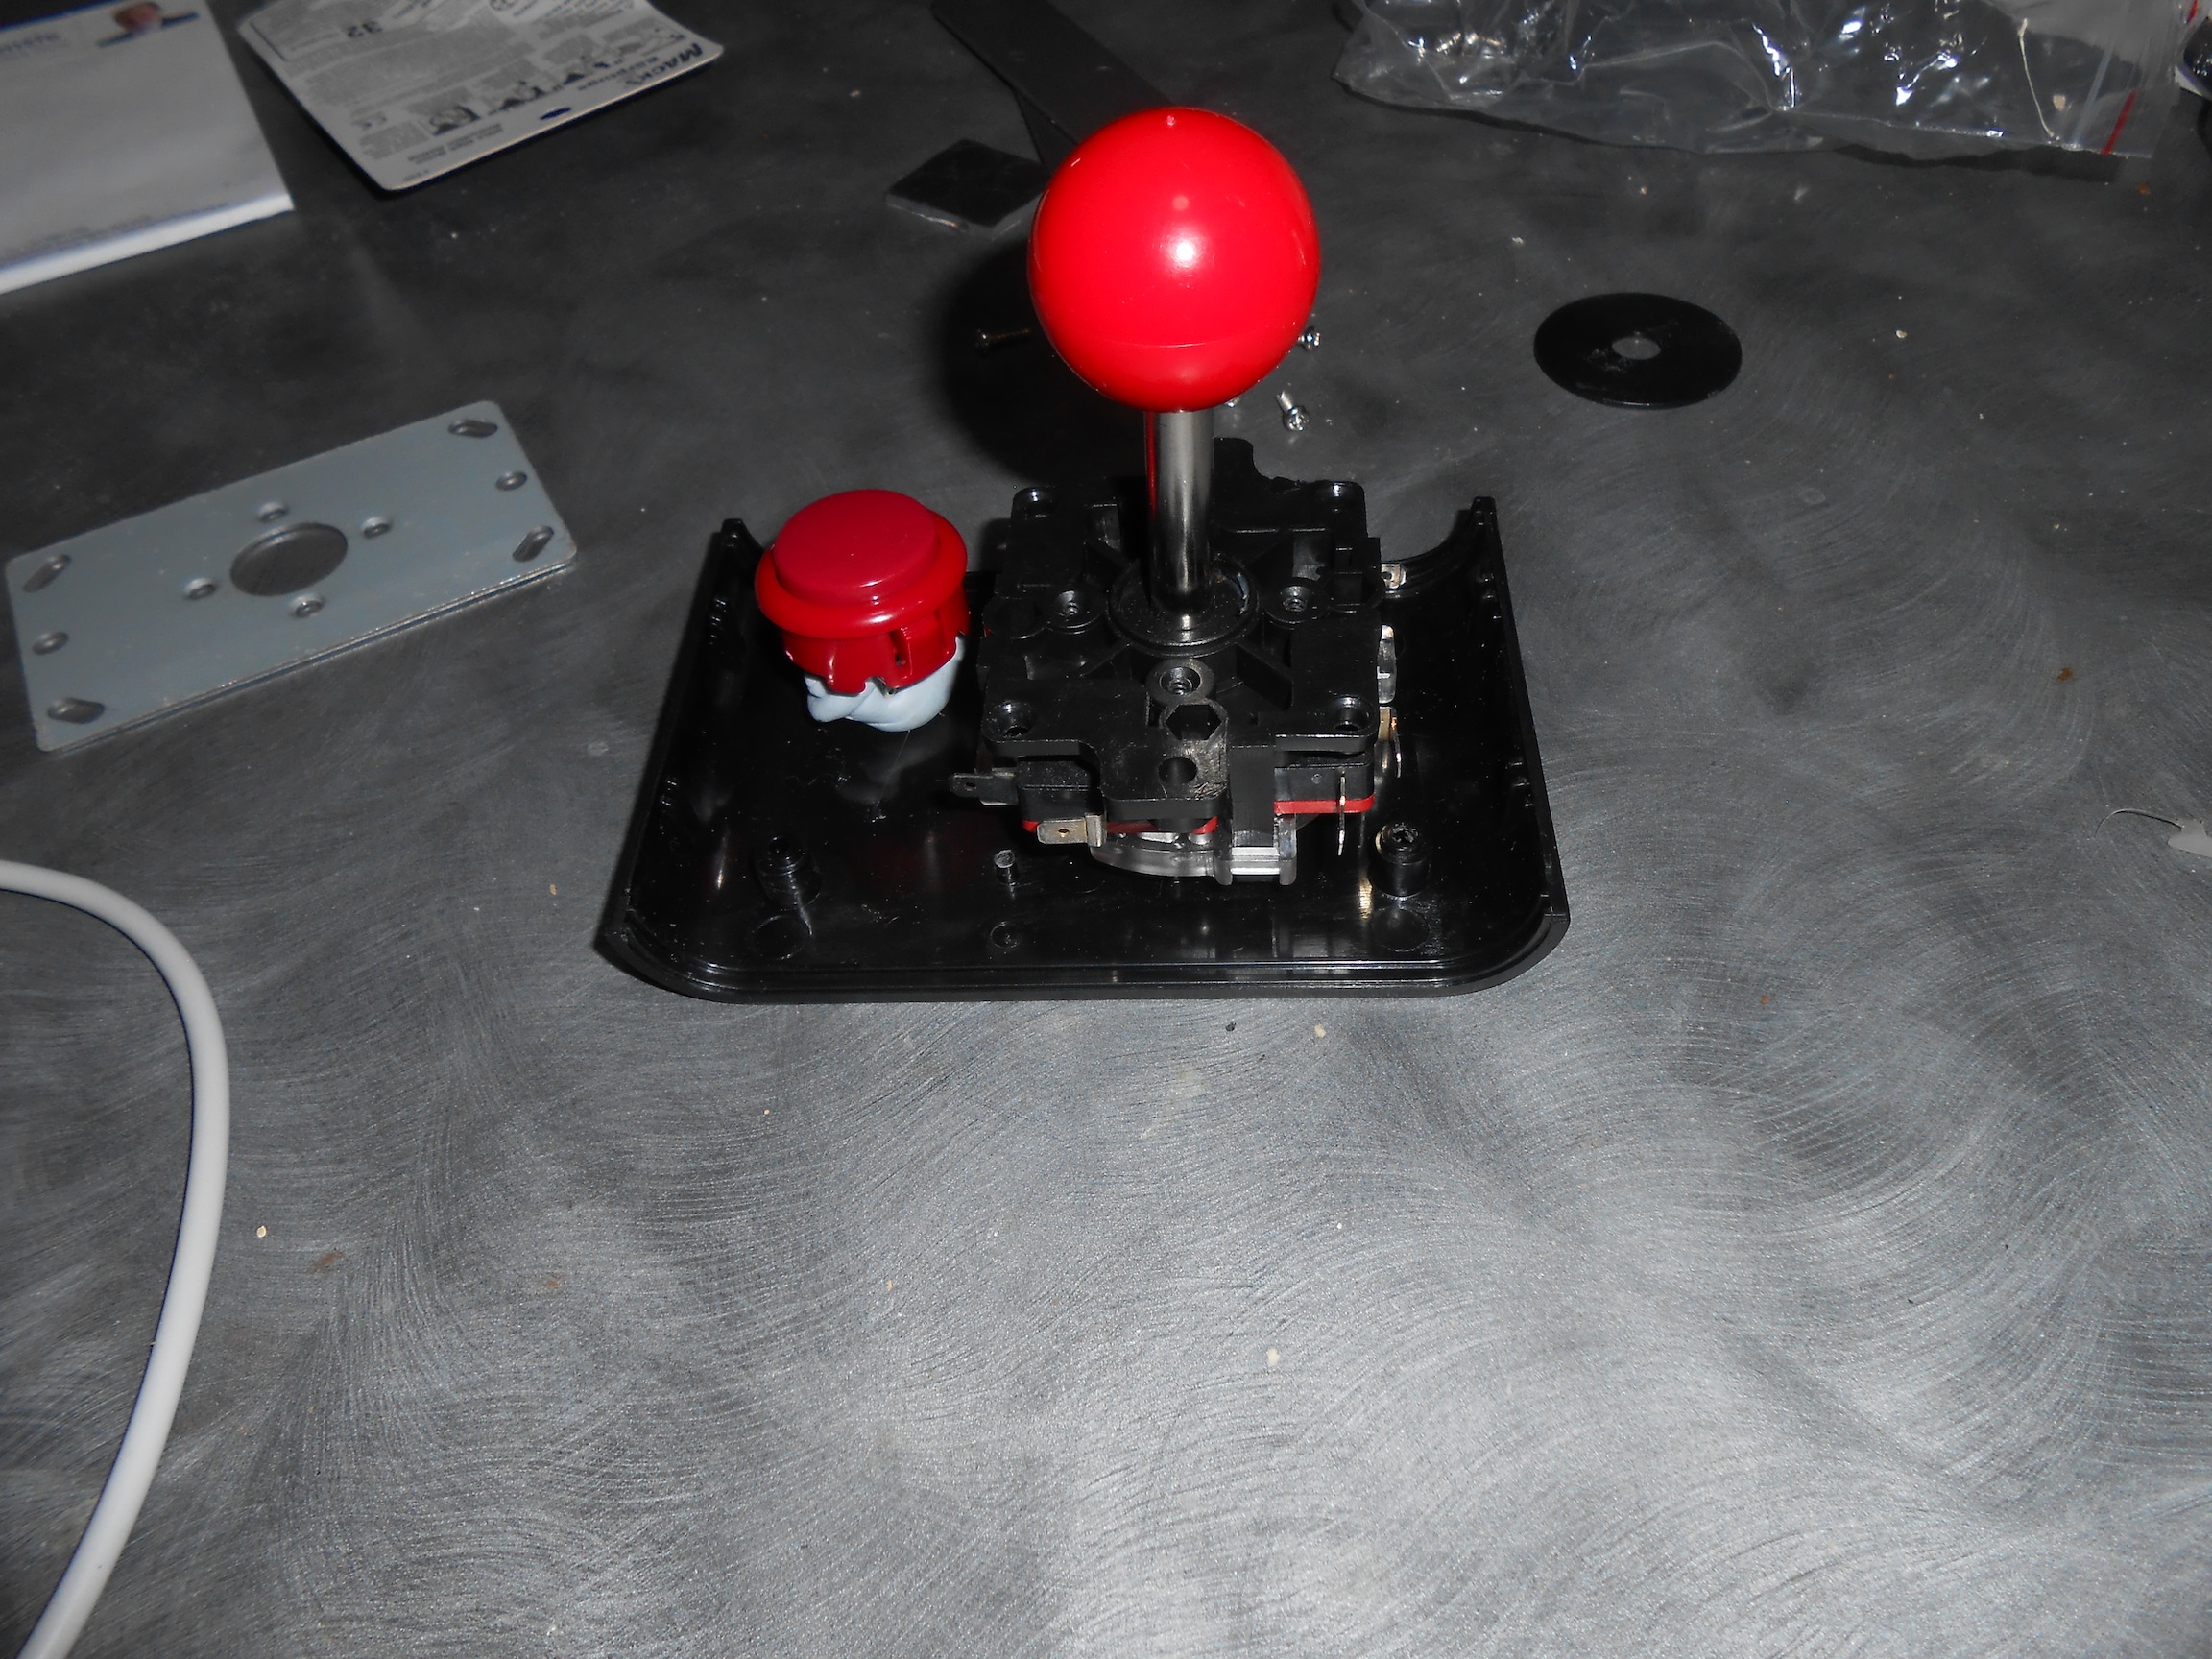
The following describes what I did. Depending on what parts you get,details may vary. First thing, I took off the metal fixing plate of the joystick. I counted on it being removable to give me an extra millimeter or two, and save quite a bit of weight and luckily I was right. Don't throw this away yet, it is a perfect template.
Arrange the parts in the bottom half of the jiffy. The jiffy I bought looks great, but it seems it might be an exclusive shape to Jaycar electronics. Its dimensions are 130 x 90 x 35. I could have done with an extra 5mm depth though, as I ended up cutting a hole in the bottom for the stick to poke out! It sticks out about 1.5mm and doesn't effect gameplay. Once I stick the rubber feet on, it should also sit level on the table!
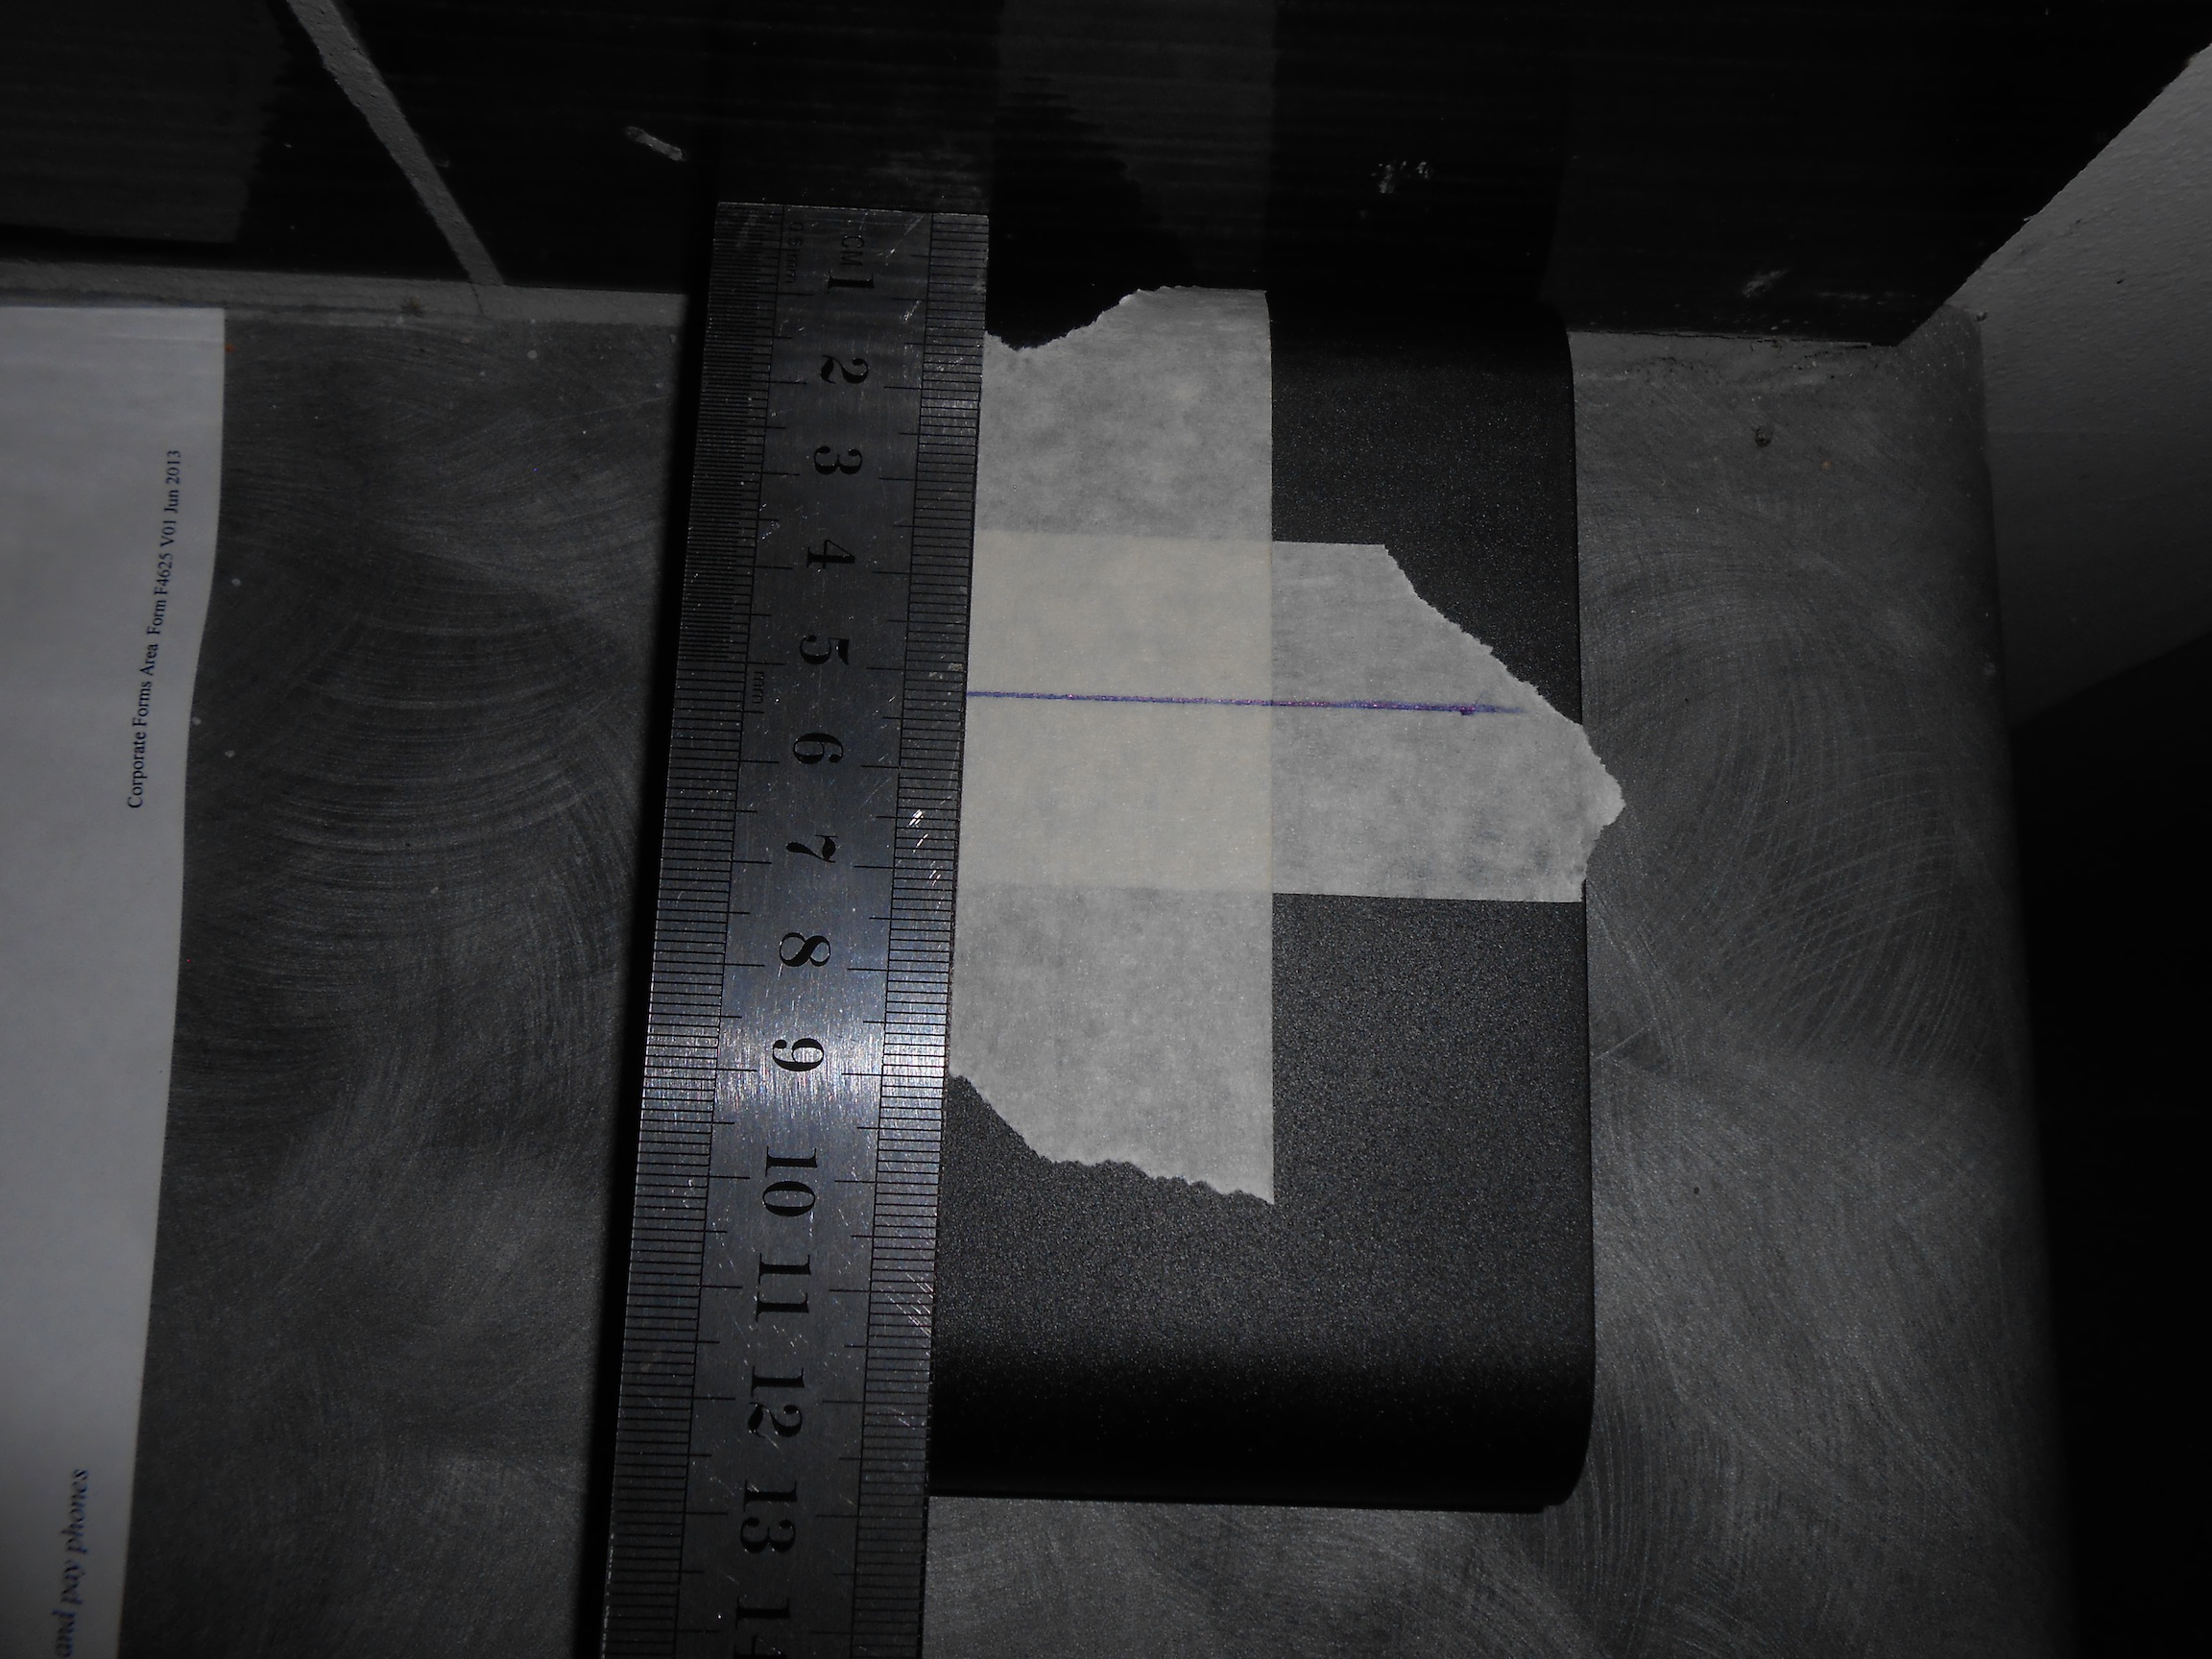
So you've come
up with the perfect arrangement. How to translate that?
Well what I did is to push it up against the side of the
wall and take measurements. In the second pic, you might
think I am trying to measure the shaft distance. That
would be a hassle to get right. Easier to measure the
distance of the mounting hole. Which is the shaft middle
anyway. Then it's a matter of getting the top half of the
jiffy, pushing it up against the wall and replicating
those measurements. Hard to see in these pics, but the
design of this particular jiffy means I had to cut two of
the four screw pillars in the top half. One for the
joystick, and one to get the button exactly where I wanted
it. It holds together well enough with just two screws
though.
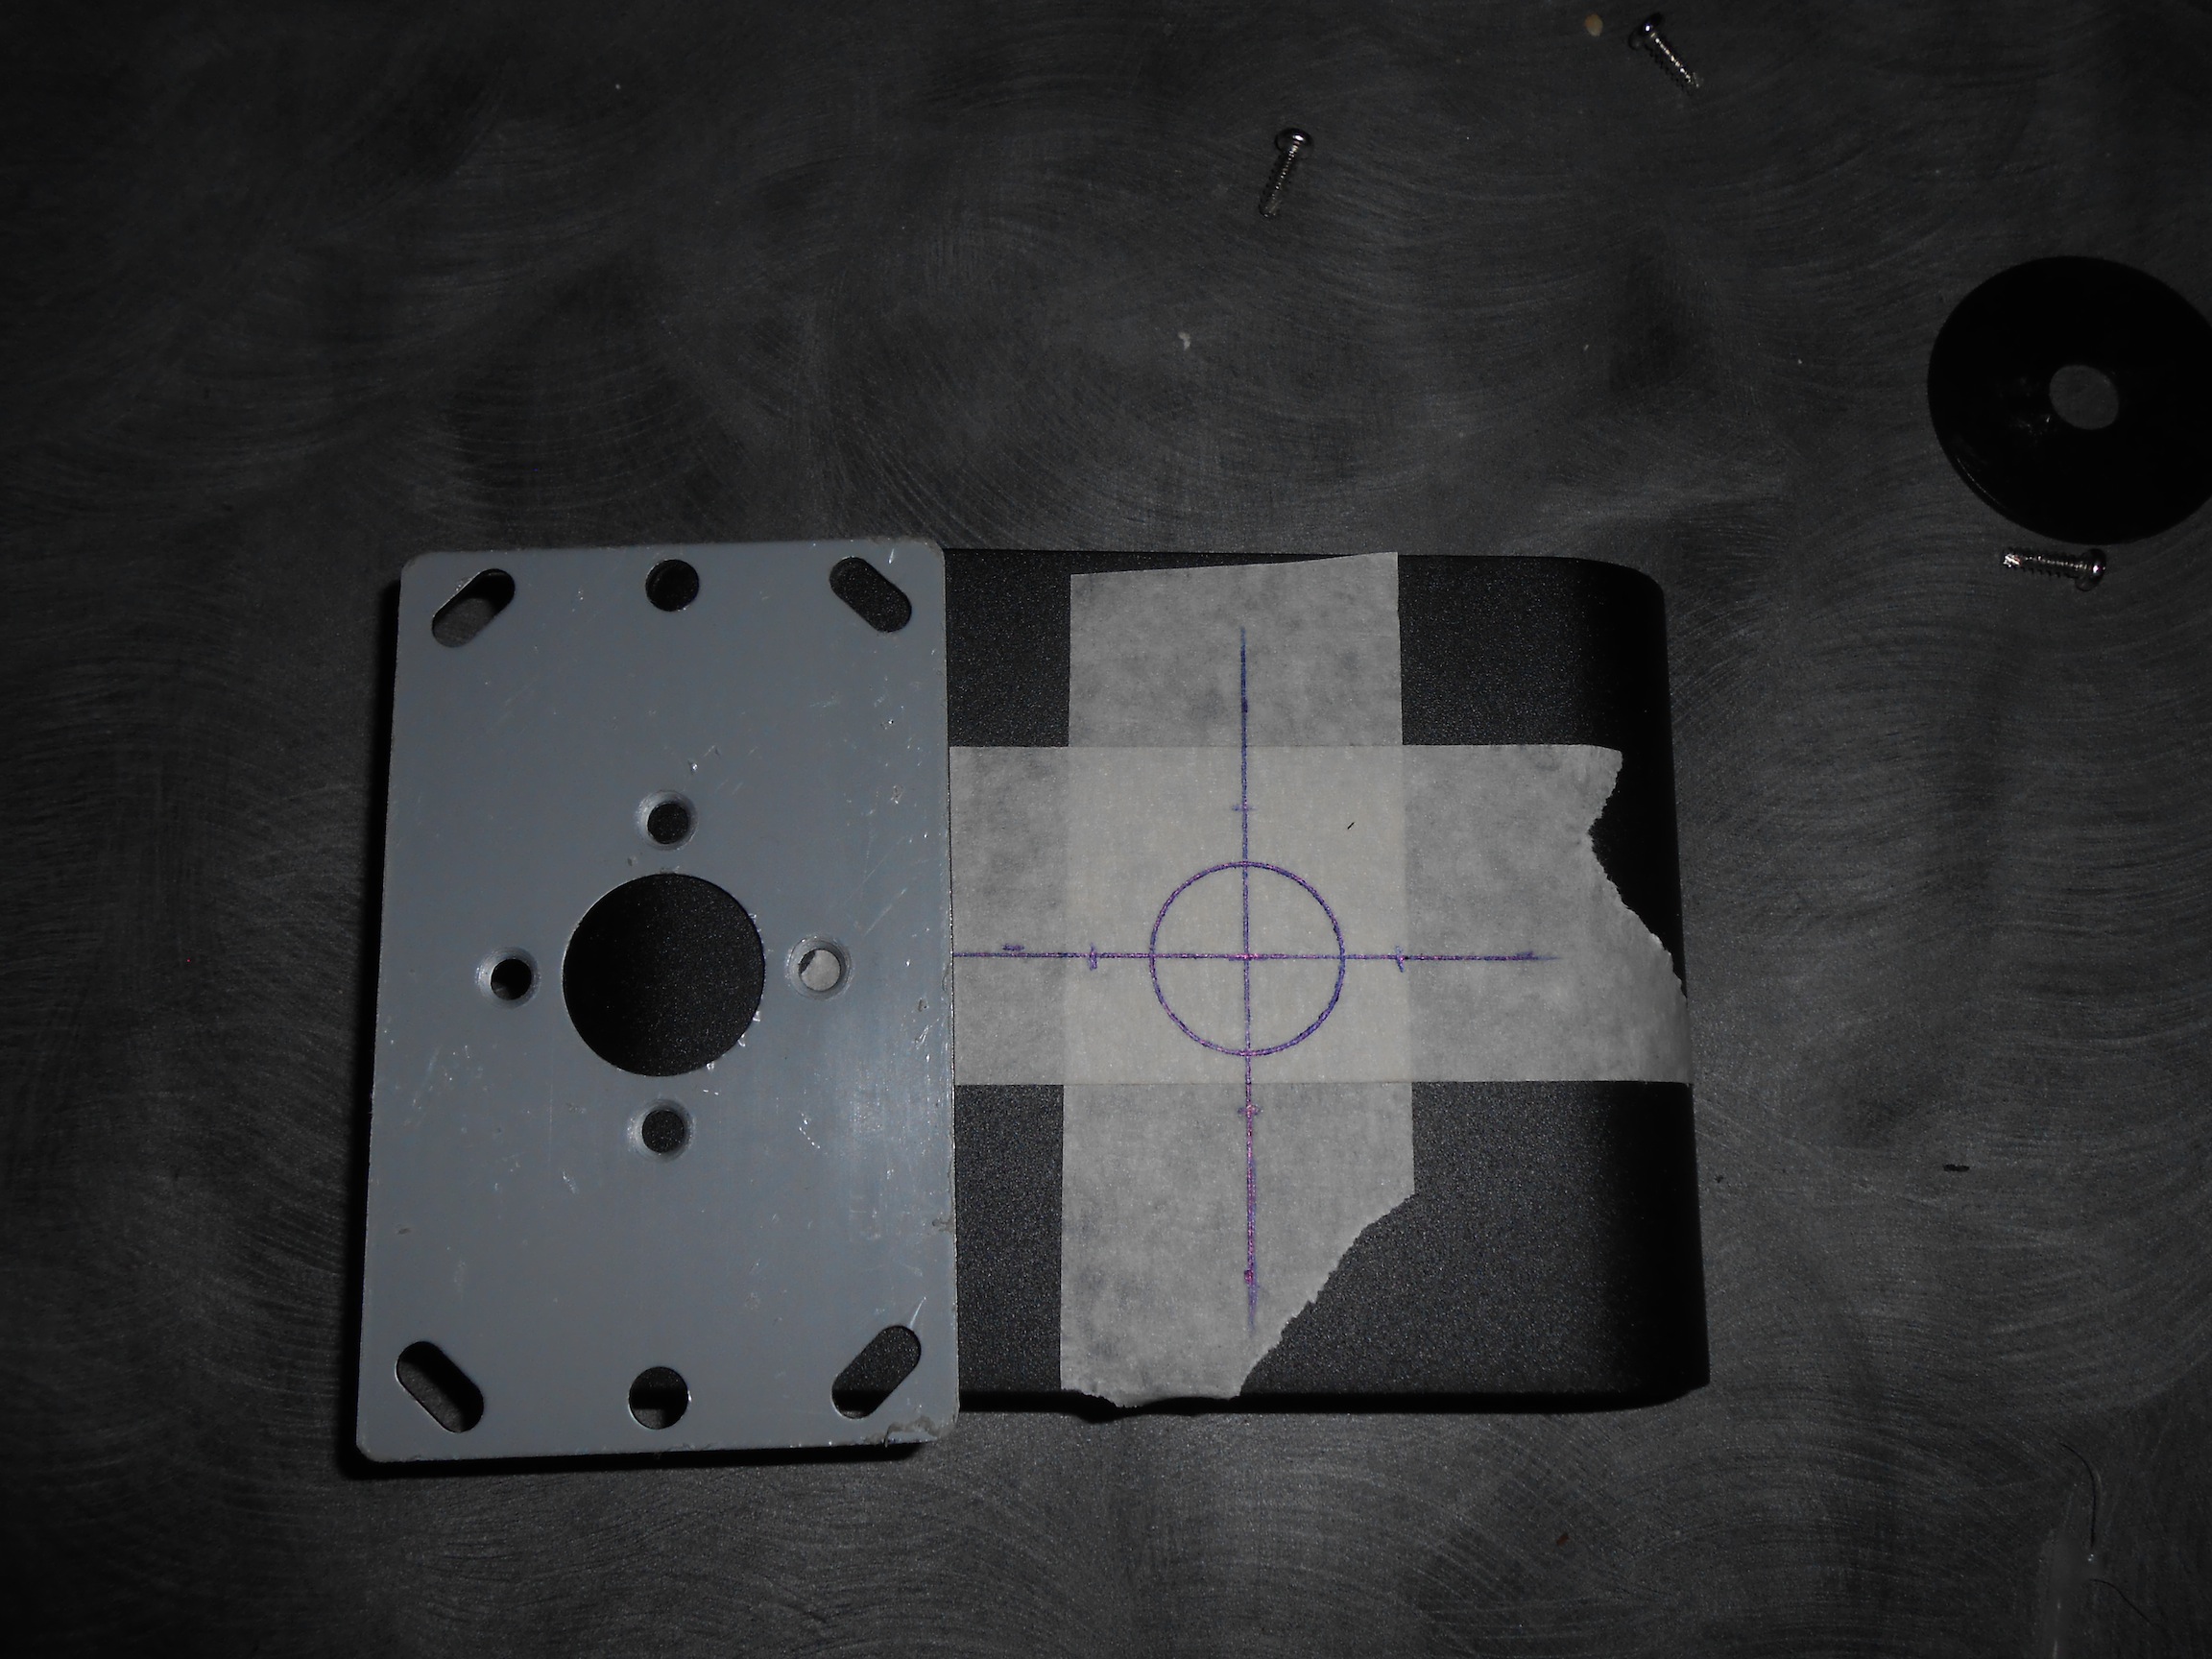
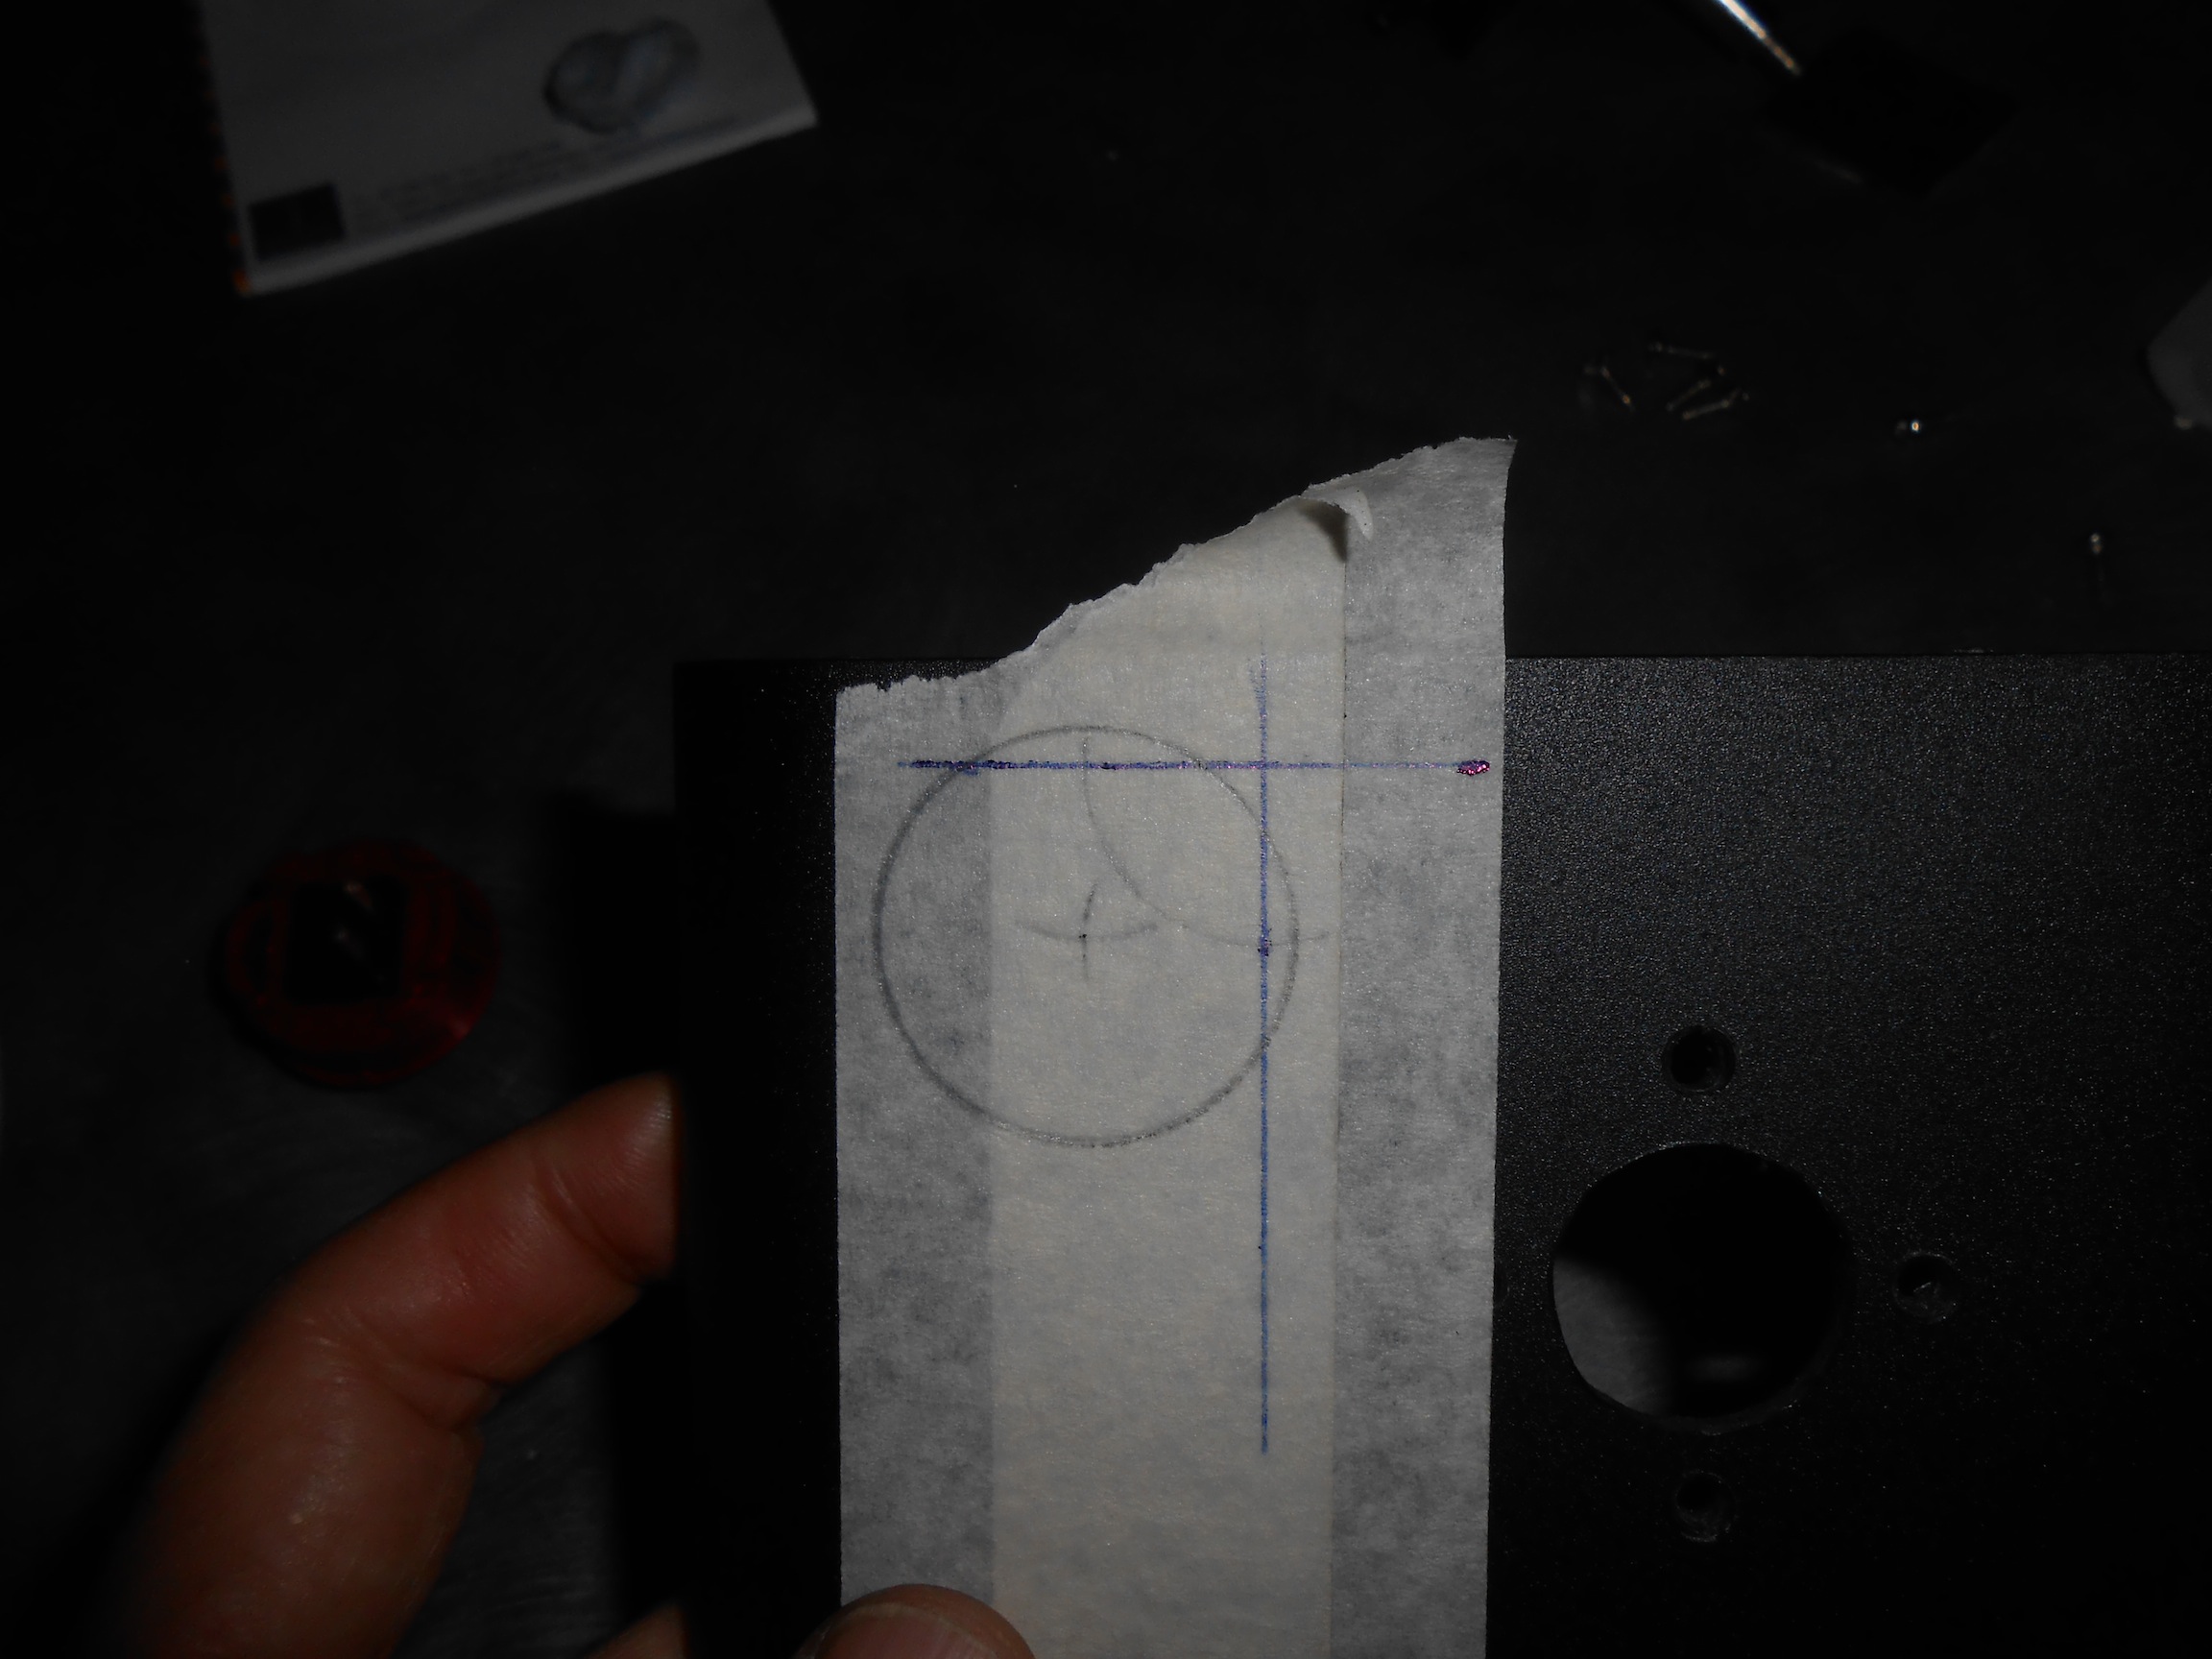
Once you've drawn a cross, you can draw the screw holes and the cut out using the template. You don't even need to know the distances or anything.
In the last
pic I am sizing up the button again. This time with the
joystick mounted in the top half. Note that the button is
sitting on the inside! It's just to get the dimenensions
right and to be sure nothing gets in the way. I'll be
transferring that info in a similar manner to before, once
I remove the joystick.
 |
 |
 |
 |
 |
 |
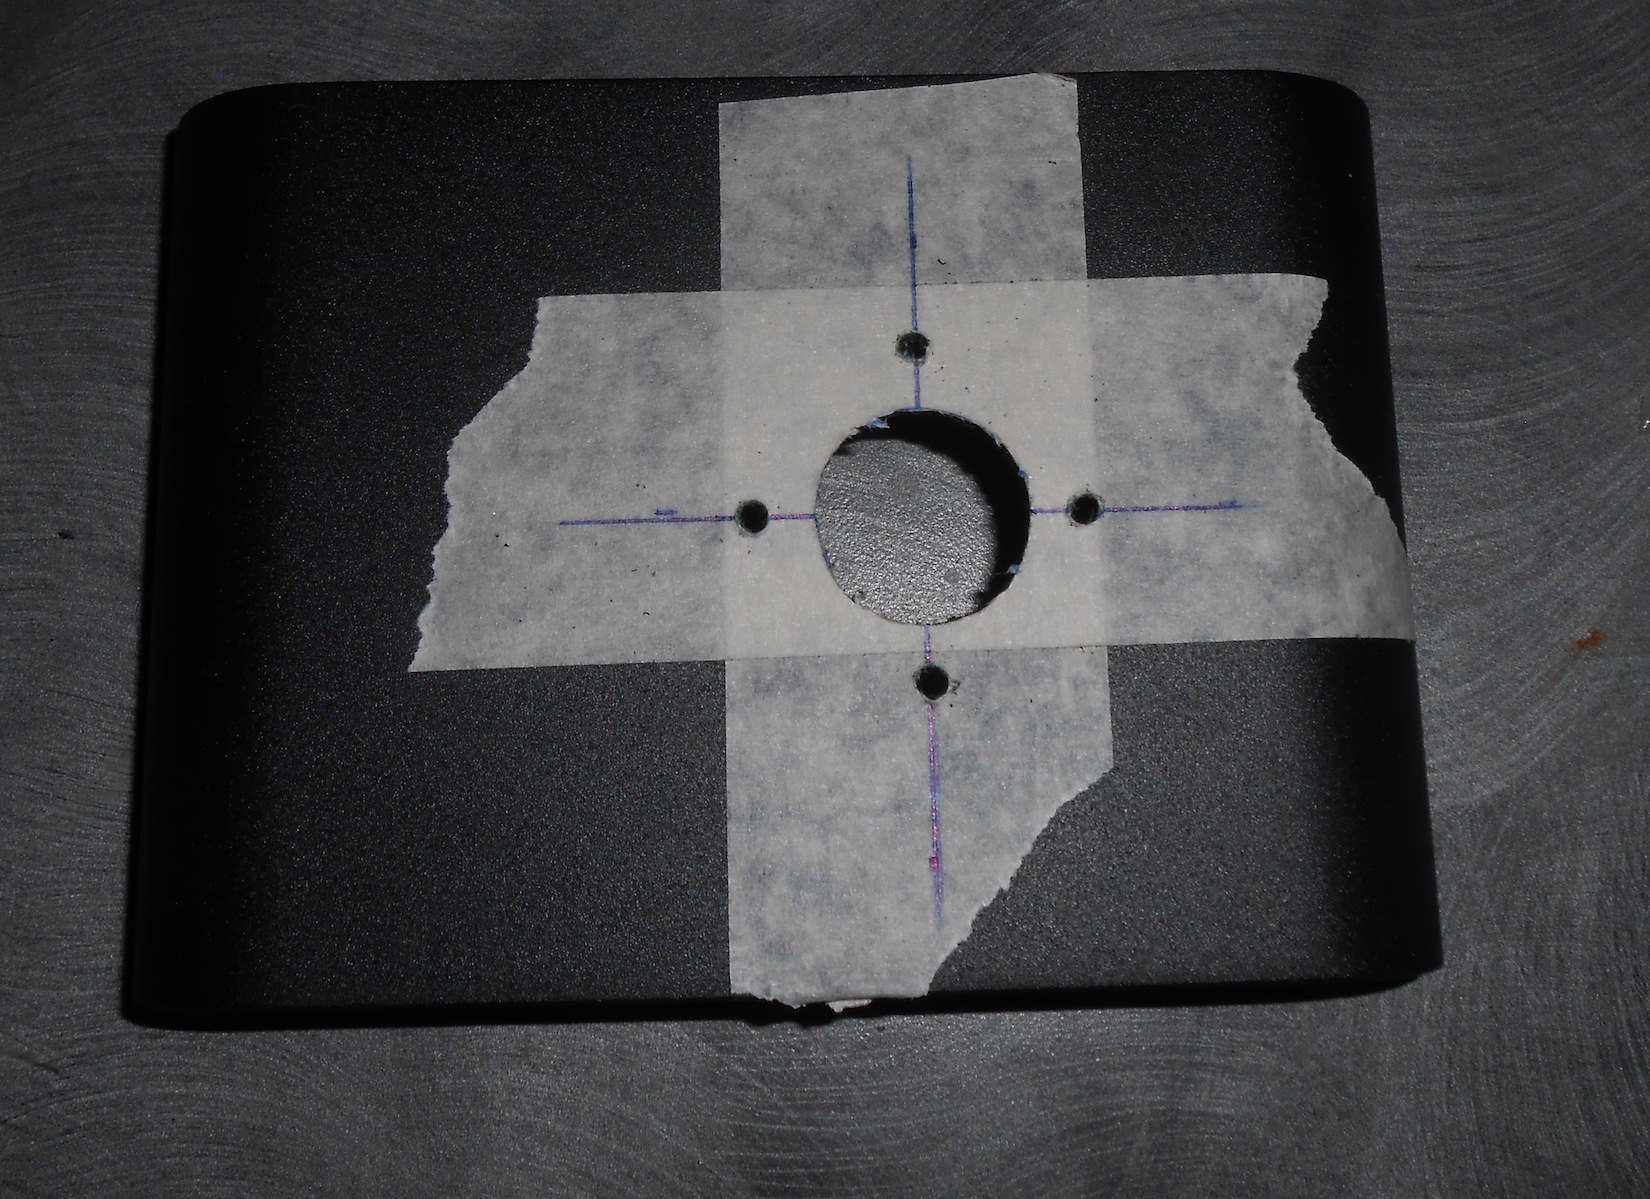
So, here
you see my markings for the button. Looks a bit Euclidian,
doesn't it? Now you can see a reason for all that boring
geometry in school! Basically, when I measured the button
against the wall, I measured to the button edge (the moving
part). I know the actual moving part of the button is 25mm
diameter, but I also know the hole I need to cut is 30mm.
Thus the blue lines are my button edge measurements. Using a
compass, the arcs give me a centre. And then I can draw a
30mm circle. Bear in mind that the lip of the button is a
bit bigger than the hole so don't cut the hole too close to
the edge as the lip might overhang, which wouldn't look
nice.
 |
 |
 |
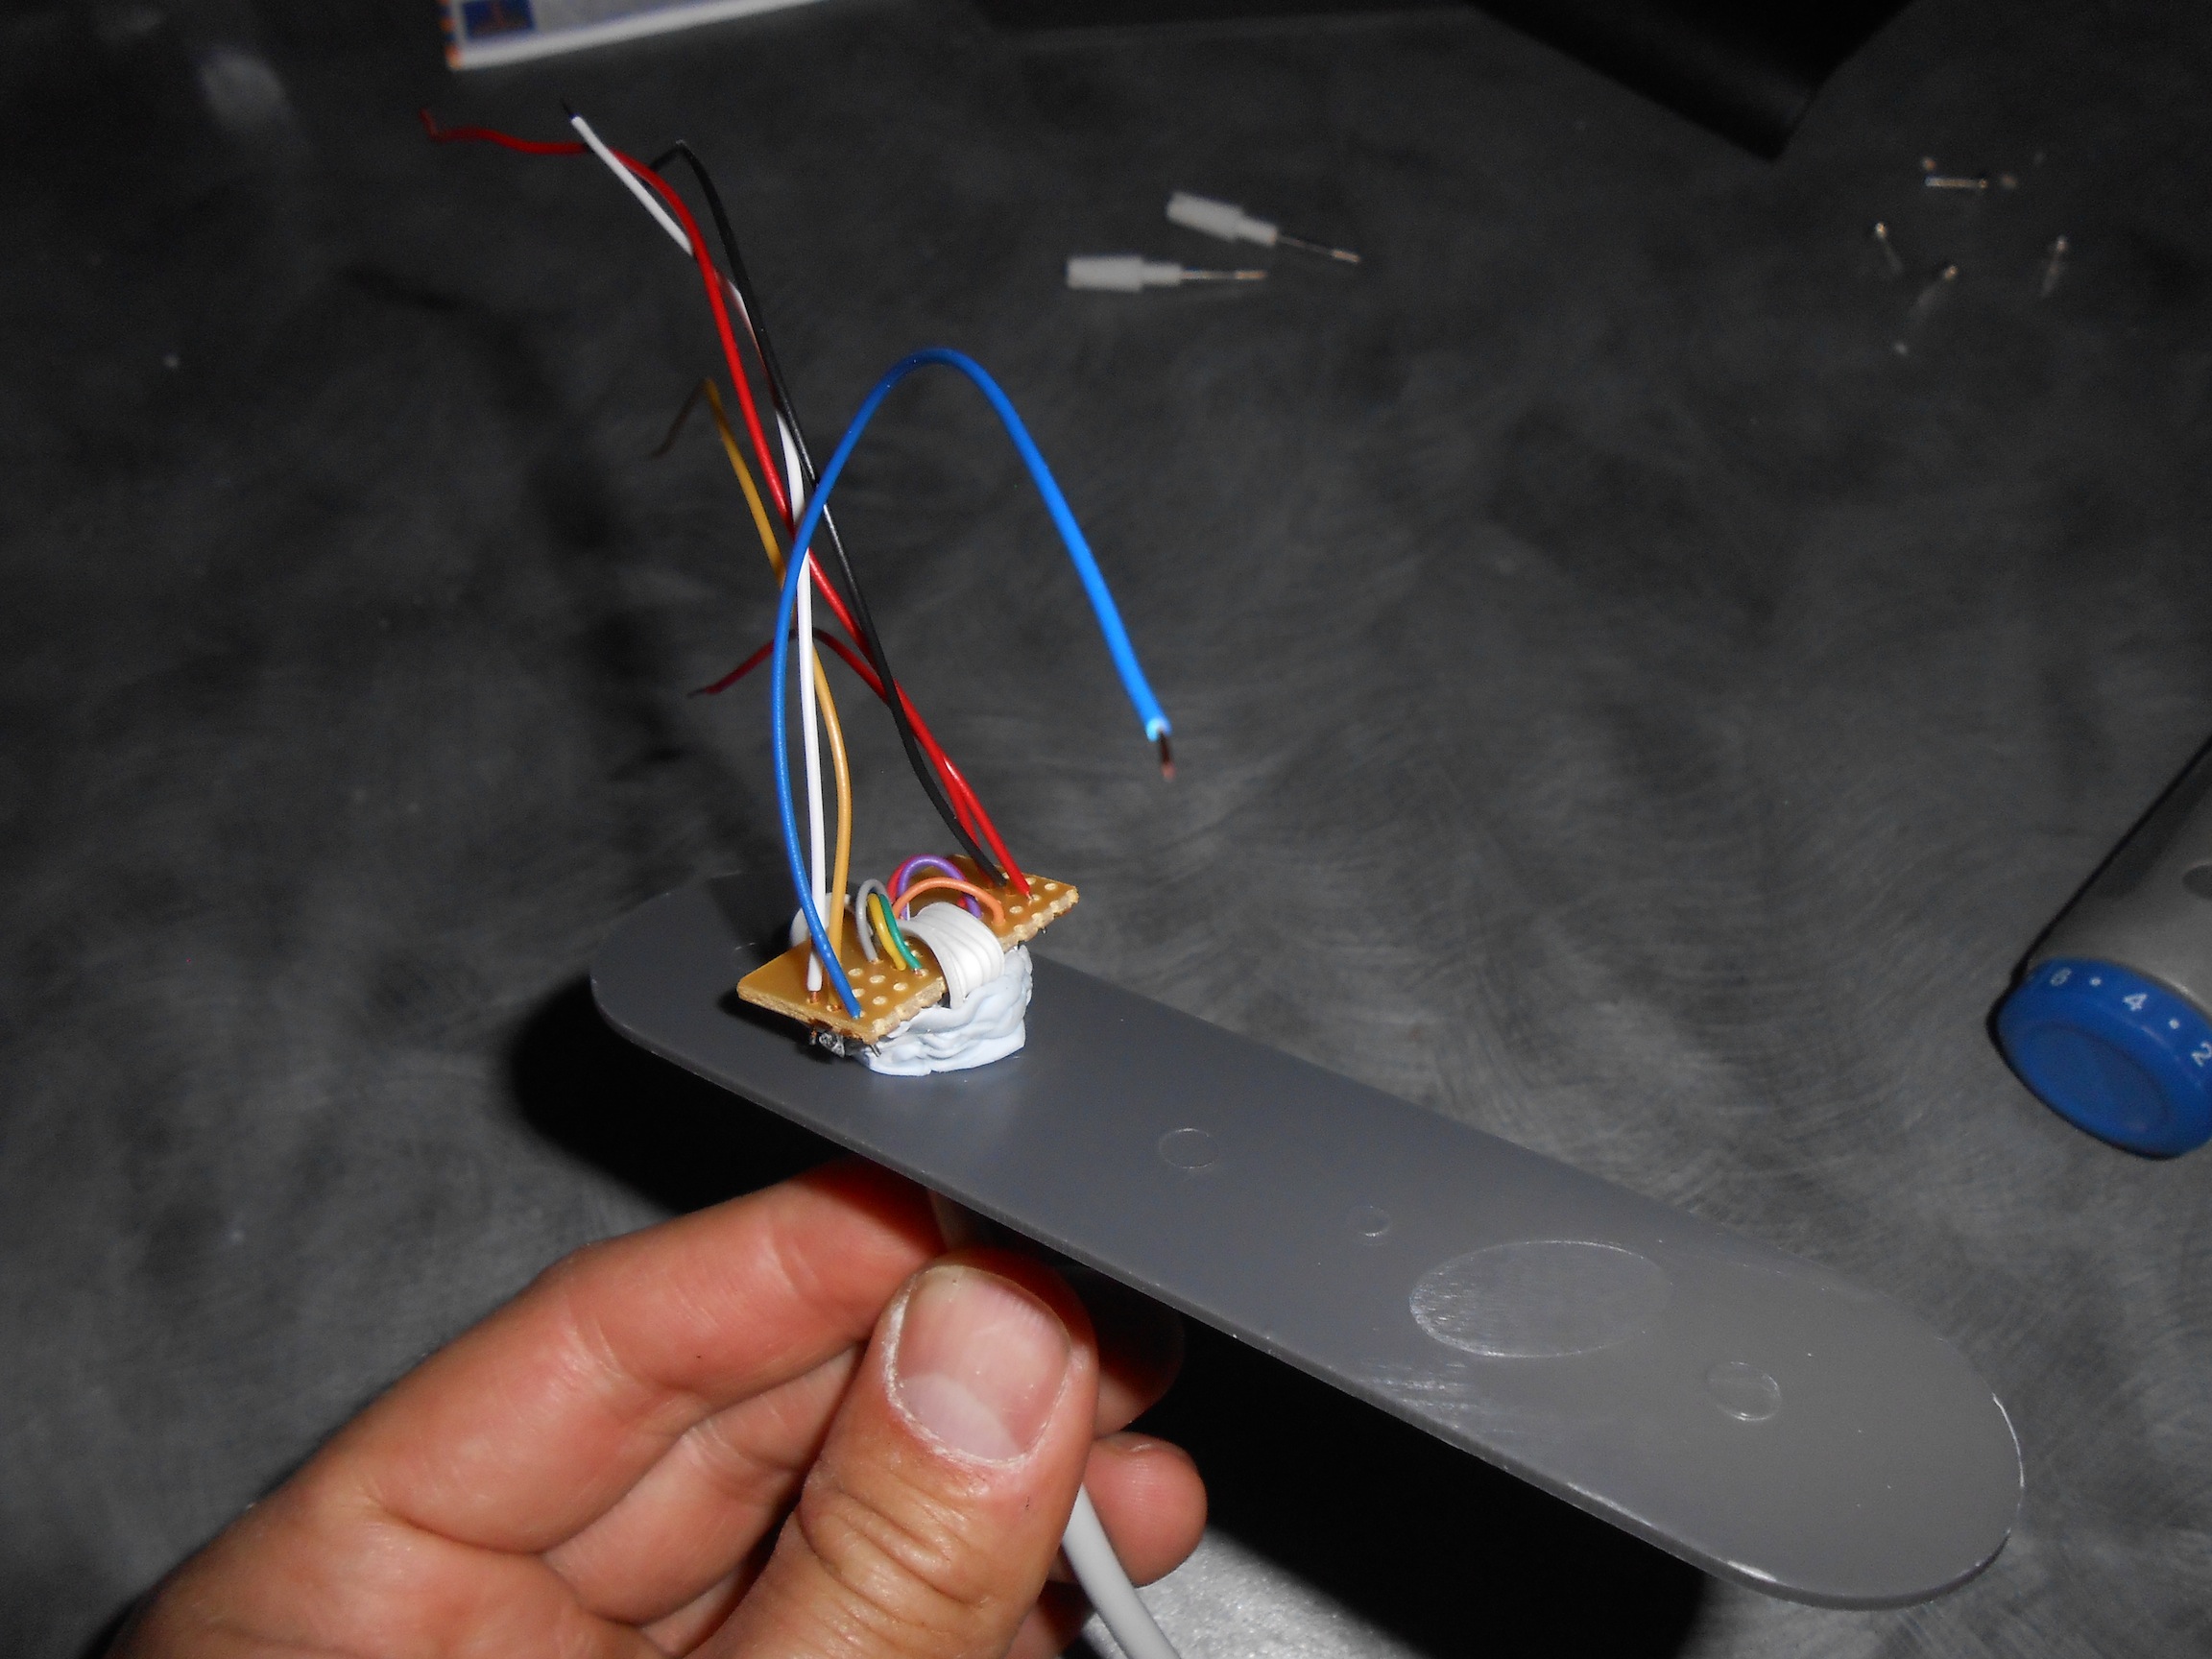
In the
last two pics, the wiring. If you use a serial cable, you'll
find the wiring is a bit delicate, so I connected the cable
wiring to some heavier stuff with a scrap bit of vero board.
Also gives you a bit more length that way. I also used the
vero board in conjunction with the split cable outer, to get
it all jammed up with some blue tack. That saved me buying a
bag of grommets just for one cable! It looks dodgy but is
holding up well. For the wiring diagram, you'll want to look
that up, or copy it from an existing controller. I would
attach a pic here, but I've forgotten what I used, and I
don't want anyone blowing up their machine because of me!
Note that most 8 bit systems use the same standard as the
Atari 2600. Except Texas Instruments. To be sure, do a
search for the system you are using it on. Check and double
check your wiring, and if you have a choice, test it on your
least valuable machine first!
VOILA!
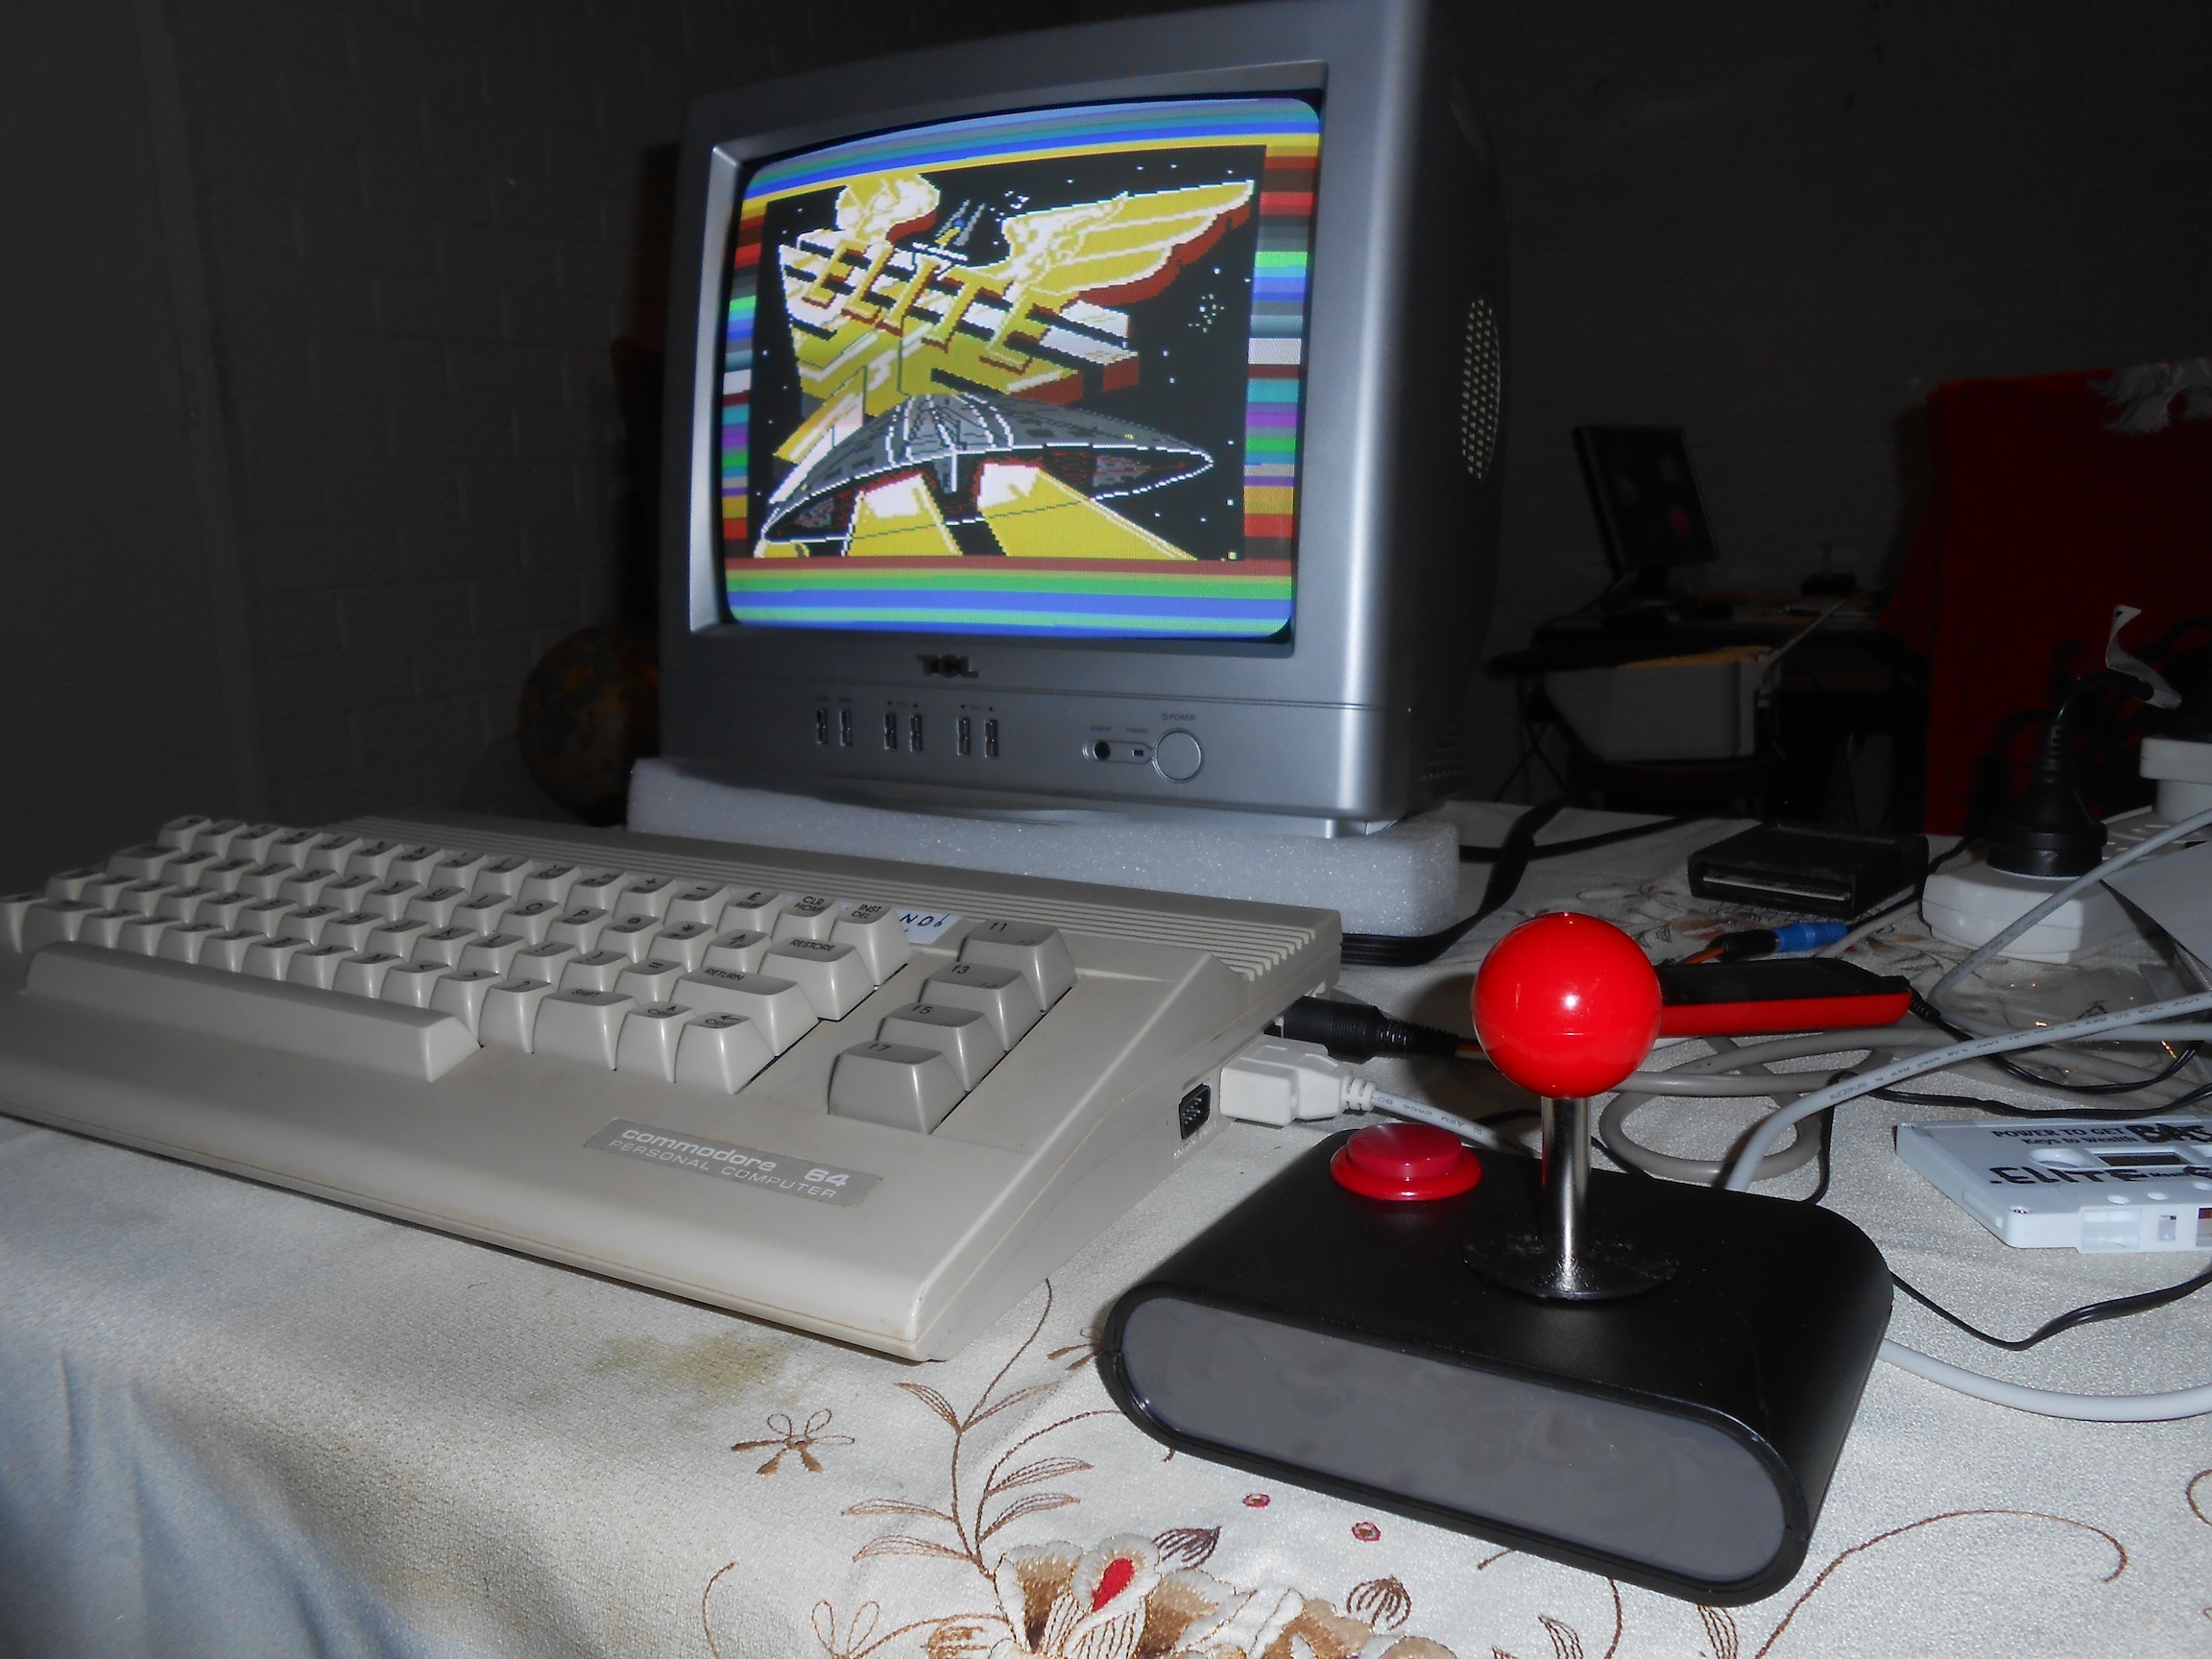
And there you have it. Fun COVID lockdown project to build, and great fun to use. The hole I cut in the bottom is the same as the hole I cut in the top, which lets the bottom of the joypad shaft move around. The screw holes I reamed out a bit with a phillips head screwdriver, to give a semblance of countersink. I cut the holes using a Dremel- drill bits for the screw holes, and a router bit for the large holes. Be careful. I ended up scratching the top when the router bit went wandering :-( If you think that might happen, it wouldn't hurt to cover the whole top with masking tape, maybe even thin card.
*30/6/16: Had a face palm moment the other day. If you want a nice looking cable, just buy a mega drive extension cable from ebay!
17/4/19:
Well at least one other person has had a go at this :)